

巧用Nginx搭建文件下载站
目录
日常中,想必许多人都会碰到一个常见的需求:文件分享。如果只是简单的小文件,直接通过微信、QQ发送即可,但若是一个几G的文件,又或者有大量文件,又或者需要分享给许多人,该如何是好呢?
可能你会说直接用网盘挺好的,然而各种网盘非会员限速,数据安全和隐私性更是毫无可言。数据掌握在自己手里才是最可靠的,而我们服务器基本都会部署Nginx,所以今天我们就来利用Nginx搭建一个文件下载站。
autoindex
使用 Nginx 来做静态资源服务器可谓是十分基础的功能了,默认情况下 Nginx 并不允许列出整个目录的内容,不过可以通过配置 autoindex 模块手动开启。
先来看最简单的示例,在 /etc/nginx/sites-enabled 下新建一个配置:
server {
        listen 8080;
        root /var/www/data;
        location / {
                autoindex on;
        }
}
然后 reload 一下 nginx:
$ sudo nginx -t
$ sudo nginx -s reload
这样子,访问 http://127.0.0.1:8080 就可以看到 /var/www/data 目录下的文件列表了:
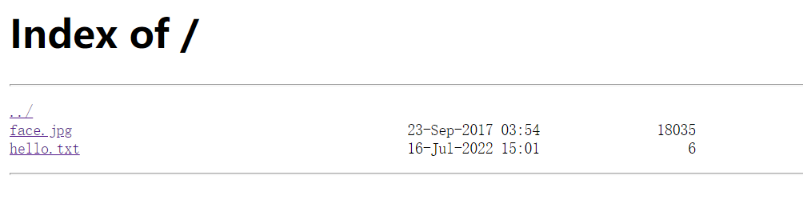
除了 autoindex,还有几个相关的参数可以配置一下:
- autoindex_exact_size
on|off:off 不显示详细字节大小,会自动换算为GB、MB、KB显示; - autoindex_localtime
on|off:on 使用本地时间,默认是UTC; - autoindex_format
html|xml|json|jsonp:以指定格式返回文件列表;
root & alias
在上面的配置中,我们使用 root 指定根目录 / 映射到 /var/www/data。
那如果想要在某个二级目录开启autoindex,比如 /data2 映射到 /var/www/data2,该如何配置呢?
server {
        listen 8080;
        root /var/www/data;

        location / {
                autoindex on;
        }

        location /data2 {
                root /var/www;
                autoindex on;
        }
}
那如果想将 /data3 映射到 /var/www/d3,又该如何配置呢?
server {
        listen 8080;
        root /var/www/data;

        location / {
                autoindex on;
        }

        location /data2 {
                root /var/www;
                autoindex on;
        }

        location /data3 {
                alias /var/www/d3;
                autoindex on;
        }
}
直观感受一下 root 和 alias 配置的区别:
- root:将请求的路径附加到指定的路径之后,即 /data2 -> root /var/www = /var/www/data2;
- alias:直接替换请求的路径,即 /data3 -> alias /var/www/d3 = /var/www/d3;
auth
如果文件不想任何人都可以下载,还可以给 nginx 设置访问密码。
首先用 htpasswd 这个工具来生成密码,由于这个工具包含在 Apache 软件包中,我们并不想安装太多其他东西,所以可以用 docker 来执行,或者在线生成密码:
$ docker run --entrypoint htpasswd httpd:2 --help
Usage:
        htpasswd [-cimBdpsDv] [-C cost] passwordfile username
        htpasswd -b[cmBdpsDv] [-C cost] passwordfile username password

        htpasswd -n[imBdps] [-C cost] username
        htpasswd -nb[mBdps] [-C cost] username password
 -c  Create a new file.
 -n  Don't update file; display results on stdout.
 -b  Use the password from the command line rather than prompting for it.
 -i  Read password from stdin without verification (for script usage).
 -m  Force MD5 encryption of the password (default).
 -B  Force bcrypt encryption of the password (very secure).
 -C  Set the computing time used for the bcrypt algorithm
     (higher is more secure but slower, default: 5, valid: 4 to 17).
 -d  Force CRYPT encryption of the password (8 chars max, insecure).
 -s  Force SHA encryption of the password (insecure).
 -p  Do not encrypt the password (plaintext, insecure).
 -D  Delete the specified user.
 -v  Verify password for the specified user.
On other systems than Windows and NetWare the '-p' flag will probably not work.
The SHA algorithm does not use a salt and is less secure than the MD5 algorithm.

$ docker run --entrypoint htpasswd httpd:2 -Bbn testuser testpassword
testuser:$2y$05$nP/kVrCbwCRUyUUMXi9o4uuT34h17ArFWE03ldEPk.uDddtws7Z5u
然后将生成的“用户名:密码”保存到某个文件(/etc/nginx/htpasswd)中,再修改nginx配置:
server {
        listen 8080;
        root /var/www/data;
        auth_basic "Authorized";
        auth_basic_user_file /etc/nginx/htpasswd;
        location / {
                autoindex on;
        }
}
这时候访问就需要输入密码啦~
fancyindex
按照前面的配置已经可以正常浏览指定目录里的文件了,然而你可能会觉得界面过于简陋……这时就可以试试 nginx 的另一个第三方module:fancyindex。
网上对于这个模块的安装有很多相似的教程,无一例外都是重新编译nginx,麻烦至极。
其实 nginx 早就支持 dynamic module,在 ubuntu 下更是可以直接通过 apt 安装:
$ sudo apt install libnginx-mod-http-fancyindex然后将之前 autoindex 的配置改为 fancyindex 即可:
server {
        listen 8080;
        root /var/www/data;
        location / {
                fancyindex on;
        }
}
将配置 reload 之后再来看一下,是不是好看多了:
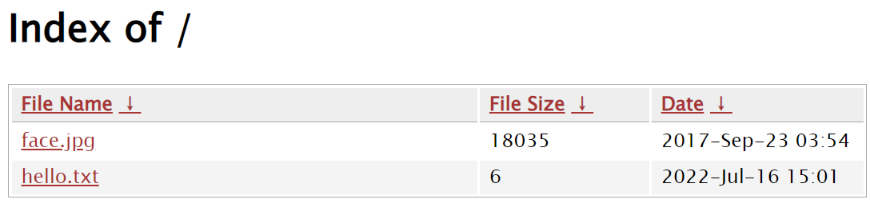
此外,fancyindex还有更多参数可以配置:
- fancyindex_default_sort [name | size | date | name_desc | size_desc | date_desc]:排序方式,默认 name;
- fancyindex_exact_size [on | off]:与 autoindex_exact_size 一样,显示精确大小(Byte)或粗略大小(GB, MB, KB);
- fancyindex_footer、fancyindex_header:自定义页面的 header 和 footer 样式;
- fancyindex_ignore:隐藏指定的文件(仅隐藏,仍然可以访问);
- fancyindex_localtime:与 autoindex_localtime 一样,显示本地时间;
- fancyindex_time_format:指定时间显示格式;
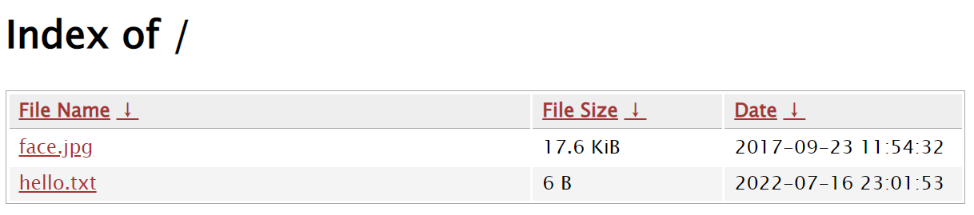
配置示例:
location / {
    fancyindex on;
    fancyindex_exact_size off;
    fancyindex_localtime on;
    fancyindex_time_format "%Y-%m-%d %H:%M:%S";
}
theme
可能你对于 fancyindex 的样式还不够满意,没问题我们可以使用第三方主题,试试 Nginx-Fancyindex-Theme 。
将 Nginx-Fancyindex-Theme-light 复制到 /var/www/data 目录下,然后修改配置:
server {
        listen 8080;
        root /var/www/data;
        location / {
                fancyindex on;
                fancyindex_exact_size off;
                fancyindex_localtime on;
                fancyindex_time_format "%Y-%m-%d %H:%M:%S";
                fancyindex_header "/Nginx-Fancyindex-Theme-light/header.html";
                fancyindex_footer "/Nginx-Fancyindex-Theme-light/footer.html";
                fancyindex_ignore "Nginx-Fancyindex-Theme-light";
        }
}
这次界面看起来舒服多了:
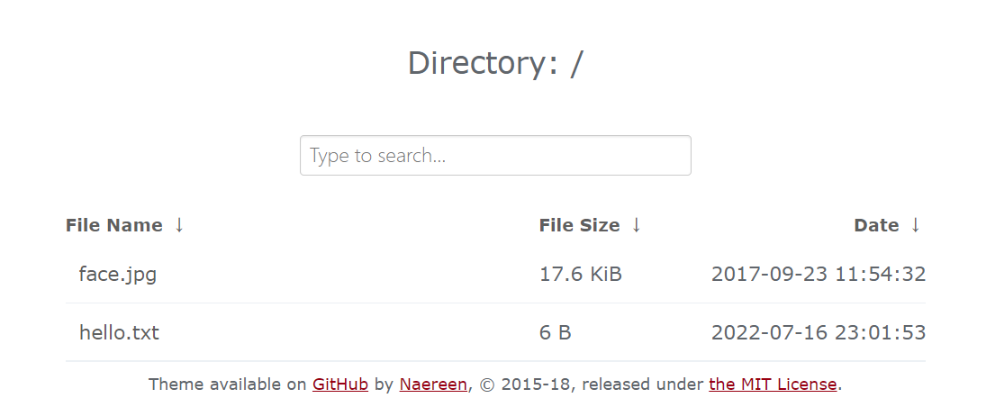
此外,Nginx-Fancyindex-Theme 还支持在头尾插入自定义的内容,只需要用 Markdown 编辑并保存为 HEADER 和 README。
File Browser
至此,你已经通过 Nginx 成功搭建了一下功能相当强大的文件下载站了。不过,文件的上传管理似乎还不太方便,那就来试试 FileBrowser 这个工具吧。
FileBrowser是一个使用Golang开发的应用,从 github 下载对应平台的二进制文件就可以直接运行了。
配置
第一次使用,先初始化一下配置(会在当前目录下生成一个 filebrowser.db 文件):
$ ./filebrowser config init接着就可以进行配置(修改配置需要注意 filebrowser 不能运行,否则可能无法连接db):
$ ./filebrowser config set -h
$ ./filebrowser config set --address 0.0.0.0
$ ./filebrowser config set --port 28080
$ ./filebrowser config set --root data
然后还需要添加用户,并设置为管理员:
$ ./filebrowser users add user1 password1
$ ./filebrowser users update user1 --perm.admin其它还有比较多配置项可以参考官方文档。
运行
配置完成后,就可以运行啦:
$ ./filebrowser
2022/07/20 15:45:19 No config file used
2022/07/20 15:45:19 Listening on [::]:28080
不过为了保证能够稳定运行以及自动重启,我们可以用 supervisor 进行管理,添加一个配置文件 /etc/supervisor/conf.d/yunpan.conf:
[program:yunpan]
directory=/home/ubuntu/vhost/yunpan
command=/home/ubuntu/vhost/yunpan/filebrowser --disable-exec
autostart=true
autorestart=true
user=ubuntu
redirect_stderr=true
stdout_logfile=/home/ubuntu/log/service/yunpan.log
然后更新一下 supervisor:
$ supervisorctl update防误删
在 filebrowser 中,用户可以对文件进行任意操作(上传、删除等),有时候可能会误操作导致文件被删除。
为了限制某些文件不能被修改/删除,我们可以通过修改文件属性来实现。
在 Linux 下,使用 chattr 命令修改文件属性:
$ sudo chattr +i somefile
$ sudo chattr -i somefile
i 标志的作用:
A file with the ‘i’ attribute cannot be modified: it cannot be deleted or renamed, no
link can be created to this file, most of the file’s metadata can not be modified, and
the file can not be opened in write mode. Only the superuser or a process possessing
the CAP_LINUX_IMMUTABLE capability can set or clear this attribute.
查看文件属性:
$ lsattr somefile
----i---------e------- somefile
带有 i 标志的文件将不能被修改(包括删除/重命名等);如果是目录带有 i 标志,则目录不能添加或删除文件,但已有文件可以被修改。
参考:
评论